Friday, April 29, 2011

My Favorite Salad

This is one of my favorite times of year...because Strawberries are in season! I love to use strawberries in salads, particularly in a Spring Mix Salad topped with crumbled goat cheese and my favorite Balsamic Vinaigrette. Have you tried Ken's Steakhouse Creamy Balsamic? It's awesome!

The ingredients are as follows: Spring Mix salad greens, thinly sliced ripe strawberries, crumbled chevre (goat cheese), and a drizzle of Balsamic Vinaigrette. You could also add sliced almonds, red onions, or homemade croutons.

On this particular day I didn't have any leftover bread for croutons, so I melted a bit of butter and olive oil in a pan and toasted some panko, seasoned with a sprinkle of parsley and oregano. It added a crunchy texture to the salad that we really enjoyed.

Bruchetta Beef Sandwiches

        A few nights ago I had a small (about 2 1/2 lb) chuck roast defrosted and I wanted to do something different with it. I stared into my pantry and found the over-used solution of a dry french onion soup packet. Blah. Then I found a can of italian diced tomatoes, fresh garlic, and basil. What to do?


Bruschetta Beef Sandwiches (Serves 4)
 *if using a larger roast double the recipe*

2 1/2 lb chuck or pot roast
1 c. water
1/2 c. red wine
1/2 of a dry french onion soup packet
1 can of Italian style diced tomatoes
4 cloves of garlic chopped
1 tbsp dry oregano
Ground black pepper
1/3 c. basil, roughly chopped

For the Sandwiches
4 French Rolls
butter
1 clove garlic, peeled and chopped in half.
Sliced Provolone Cheese
Shredded Parmesan
Balsamic Vinegar
1/3 c. chopped basil

Directions for Roast: Rub roast with french onion soup, oregano, and ground pepper. Place in the bottom of a slow cooker. Add diced tomatoes, water, red wine, chopped garlic, and basil. Cook on low for 8 hours. When roast is done shred with a fork and place meat back into the liquid.

To assemble sandwiches: Spread french rolls with butter and toast under broiler. Once toasted, rub garlic half liberally on the inside of toasted rolls and set aside. With a slotted spoon, remove roasted from slow cooker (making sure to get some of those yummy tomatoes and garlic pieces in the mix) and place on rolls. Top with sliced provolone and Parmesan and place under the broiler a few more minutes until cheese is melted and bubbling. Top with fresh basil and a drizzle of balsamic vinegar. Enjoy! 


Wednesday, April 20, 2011

Miniature Chocolate Cupcakes with Raspberry Buttercream

After some chaos, more than I would have liked, my counter tops are installed and my kitchen faucet is finally fully functioning! Yay! Yesterday was the first day that everything got put back in its rightful place and I finally had room to maneuver around my newly beautified kitchen. So, of course, I was in the mood for a little bit of baking. Today Garrison and I had a Easter Egg Hunt to attend with a mommy group from our church. I wanted to make something extra special. I scanned my refrigerator looking for some inspiration and stumbled upon the jar of raspberry preserves I used in my Lemon & Poppy Seed Bread with Raspberry Swirl last week. Light bulb! I decided to try my hand at some Raspberry Buttercream Frosting. I couldn't think of anything more delicious and cute to frost than miniature chocolate cupcakes.

The Miniature Cupcakes were straight from a box of cake mix. Now and then I enjoy making a cake from scratch, but you'd be surprised that a box cake mix can be moist and delicious, as long as you follow the directions and are careful not to over bake. My mom and dad make the best wedding cake I've ever tasted...and people are always amazed when they tell them that it came from a box. 


Raspberry Buttercream

1/2 c. shortening
1/2 c. butter, softened
1 tsp. vanilla extract
5 tbsp. Raspberry Preserves
4 -4 1/2  cups confectioners' sugar

Whip butter, shortening, and vanilla extract in a mixer at medium speed until light and fluffy. While it's mixing, place raspberry preserves in a microwave safe bowl and microwave on about 50% power for 15 second intervals until the preserves can easily be stirred and are liquid. Add confectioners' sugar and preserves to creamed mixture and whip at medium-high speed for about 5 minutes. 

Pipe or spread frosting onto cooled cupcakes. I placed my frosting into a large Ziploc bag, squeezed out the air, cut off the tip, and swirled atop my cupcakes.


look at my pretty quartz countertops!


Monday, April 18, 2011

Our Favorite Side Dish


Forget complicated risotto. This savory dish is a snap to prepare and never turns out badly. It also includes two of my favorite things, cheese and fresh basil. Orzo is a mix between a rice and pasta. Think of it as "giant" rice. It should be easy to find in the pasta section of your grocery store. We like it served with grilled chicken breast, but if you're looking for a quick one-pot meal you can add some fresh vegetables while the orzo is simmering. I wouldn't classify this as a "healthy" dish, only because I don't think you're going to find whole wheat "orzo" anytime soon. We try not to eat a whole lot of white starch, but this is one of those dishes that you should classify as "worth every last delicious calorie." 

Orzo with Basil & Parmesan
adapted from Allrecipes.com

2 Tbsp. Butter
2 cloves fresh garlic, chopped
1 c. uncooked orzo pasta
1 can of chicken broth (14.5 oz)
1/2 c. grated (or shaved) Parmesan
salt and pepper to taste
1/4 c. chopped fresh basil


Melt butter in a skillet on medium heat. Add orzo and chopped garlic, stirring until it starts to brown.

Add chicken broth and bring to a boil. Cover, reduce heat and simmer about 15-20 minutes until all the broth is absorbed.

Remove from heat and stir in Parmesan and basil. Season with salt and pepper and serve warm.
(Makes 4 Servings)

Thursday, April 14, 2011

Mahi Mahi Fish Tacos with Lime Sauce

A few weeks ago we picked up some groceries at Fresh & Easy and I spotted some frozen Mahi Mahi Fillets. Even better, they were less than $5 for a package that would easily feed 4. I have never really liked the taste of fish. Occasionally I will eat Ahi Tuna Steaks...but they can be pretty expensive. That being said, my poor deprived husband, who really likes fish and never gets to eat it, was pretty excited when I asked if we should try it. "Mahi Mahi doesn't taste fishy," he said. I don't know how or why we classify the taste of fish by fishiness...but he was right. It didn't taste fishy at all, it tasted wonderful!

We also liked this meal because it was easy to adapt for our children. Our oldest, and pickiest, had a cheese quesadilla and some corn. The little one (who would eat a fish taco if he could figure out how to do so without making a mess everywhere) ate chunks of fish along side some black beans and corn. Bottom line, mom didn't feel like a short order cook tonight, and everyone was happy!

Mahi Mahi Fish Tacos with Lime Sauce

*note for a busy mom: Save yourself some trouble and buy carrots pre-shredded near the packaged coleslaw at your grocer. They're usually  inexpensive and easy to find.

Also, the original recipe calls for cabbage, but cabbage was pretty pricey at my grocer. I also knew most of the head wouldn't get used before it went bad, so I substituted for Romaine Lettuce. Use what's affordable!
Ingredients
1 lb. Mahi Mahi Fillets
3 limes
1/2 c. mayonnaise (light mayo works fine!)
1 tsp. chili powder
1/3 c. all-purpose flour
1/2 tsp. salt
course ground pepper
8  small (fajita size) flour tortillas
1  cup  shredded cabbage or shredded lettuce
1/4 c. cilantro, rinsed and coarsely chopped (if you hate cilantro leave it out!)
1/2 c. shredded carrots
1 jalapeno or Serrano pepper, seeded and diced
cheddar cheese (optional)
4-6 tbsp. olive oil

In a medium bowl toss together carrots, cabbage, cilantro, and diced jalapeno.

Rinse fish under cold water and pat dry with paper towels. Cut into 1 inch pieces.

Juice two limes into a small bowl. Cut remaining lime into wedges for serving and set aside. Mix mayonnaise and chili powder into lime juice. Remove about 1/3 cup of sauce and toss with fish. Set remaining sauce aside for serving.

Heat 2 tablespoons of olive oil over medium heat. In a shallow dish combine flour, salt, and a pinch of course ground pepper. Work with about a third of the fish at a time and coat in the flour mixture and then carefully add to hot oil. Cook 2-4 minutes or until fish flakes and fish is browned evenly on all sides. Drain on paper towels and add more oil as needed  to cook remaining fish.

Warm tortillas. Top with fish, cabbage mixture, cheese, and a drizzle of Lime Sauce. Serve with lime wedges.

Makes 4 servings.  

Monday, April 11, 2011

Lemon-Poppy Seed Bread with Raspberry Swirl


Perfect for a mid-morning coffee time! This bread is pretty, springy, light and delish! I've always been a fan of those delicious lemon-poppy seed muffins that Costco makes, but I never buy them because they are so heavy! A few days ago I started experimenting with this lovely lightened-up concoction and today I added the Raspberry Swirl, which seemed to be just the right touch. Try it out for yourself and see what you think. It's a good thing this bread is so easy to make, because it disappears very fast!

Lemon-Poppy Seed Bread with Raspberry Glaze

1/4 c. butter or margarine
3/4 c. sugar
2 eggs
1/4 c. reduced fat sour cream
1/4 c. lemon juice (fresh squeezed is always the best!)
1/2 tsp. of rum extract (almond extract would be great as well)
1 tbsp. lemon zest
1 1/2 c. flour
1/4 tsp. salt
1 tsp. baking powder
1/2 c. milk
1 1/2 tsp. poppy seeds
2 tbsp. raspberry preserves


Directions:

Cream together butter and sugar. Add eggs, beating in one at a time. Beat in sour cream, lemon juice, rum extract and lemon zest. In a medium bowl combine flour, salt, and baking powder. Slowly incorporate dry ingredients into the creamed mixture, alternating with milk. Fold in poppy seeds.

Pour batter into a prepared loaf pan. Add raspberry preserves to a small microwave safe bowl. Microwave for 20-30 seconds until preserves are liquid. Drizzle preserves on top of your batter and drag a butter knife in rows through the length of pan to create swirls in the top portion of batter. Turn pan sideways and repeat. Bake for approximately 45 minutes or until a toothpick inserted comes out clean.


Saturday, April 9, 2011

Happy Sundae


I got this awesome idea from a recipe booklet included with my last edition of Parenting magazine. These treats are simple and fun...not to mention a great way to impress your friends! The process is very simple. Line a muffin tin with foil cupcake liners. Melt some white chocolate chips. Use the back of a spoon to spread chocolate over the bottom and up the sides of each liner. Freeze, and add a second coat of melted chocolate if the first coat appears too thin. In about 5 minutes you'll be able to pull back the foil and you'll be left with these adorable white chocolate bowls. If you're having company you could easily prepare the bowls and even scoop the ice cream in them ahead of time. Pull them out of the freezer let your guests top with their favorite toppings. I'm sure the folks at Parenting intended these great little treats to be fun for the kiddos...but in our house they are much more appreciated grown-ups! Especially when they are  filled with rich coffee ice cream.

Thursday, April 7, 2011

Egg-stra Special Easter Eggs


Oh Martha! She's got some of the most creative ideas! Last year I stumbled upon her instructions for Silk -Tie Easter Eggs and I decided to try it out on hollowed out eggs. This way they won't spoil, and they turned out so cool! With careful packing (thank you Hubby!) they survived our move to Southern California. Today I made several more to add to my display. I'm thinking that this will be an ongoing Easter Tradition.

*Tip: Silk items can be purchased at a second-hand store. I got mine for $2.00 a piece at Goodwill. Double check labels to make sure you're using 100% silk.

What you'll need:
small or medium eggs
A long thin nail
Something to tap in the nail (I used a mallet)
A Glass or Enamel Pot (I use a metal stockpot and they come out just fine.)
A ceramic plate or smaller pan lid, slightly smaller than the diameter of the pot you are using. (This will keep the hollowed eggs from bobbing above the water.)
Silk ties, blouses, or boxers, cut into pieces large enough to cover an egg
White sheets (or pillow cases, tablecloths, or in my case the hubby's old white T-Shirt) cut to cover silk wrapped eggs
Twist ties or string
3 tablespoons of white vinegar
Warm water
Vegetable oil
Paper towels
Tongs or spoon

How to hollow eggs
*Prepare for a few cracked eggs. I've never done a dozen without cracking a few. :)
  • Wash and dry raw eggs.
  • Keep the egg in the carton and place the tip of the nail onto the top of the egg. Tap (very lightly) with a hammer or mallet, piercing a small hole in the top of the egg.
  • Twist the nail into the egg and flip so that the egg is on top of the nail. Run the nail into the egg several times to help break up the yolk. Flip the egg and do this again on the other side.
  • Place your lips on one end of the egg and blow out the yolk (over the sink or into a bowl)
  • Rinse with warm water and set aside.
Dyeing the eggs
  • Wrap an egg with silk, print side facing in. If the piece is not large enough to cover the entire egg it will still work. Gather ends of the silk and tie off. It will kind of look like a little package.
  • Place wrapped egg into the center of a piece of white cloth. Gather the ends of the cloth and tie off.
  • Place a few eggs (enough that they aren't over crowded) into your pot. Fill pot with enough water to cover eggs completely. Add three tablespoons of white vinegar and place a ceramic plate or lid carefully over the eggs to hold them underwater.
  • Bring water to a low boil, turn heat down, and simmer for 20 minutes
  • Remove eggs from water with tongs or spoon and let cool.
  • Remove cloth from cooled eggs and blow out the water. You may have to re-pierce holes to do this. If you want your eggs to be shiny wipe with vegetable oil.  

Monday, April 4, 2011

Homemade Wheat Crackers

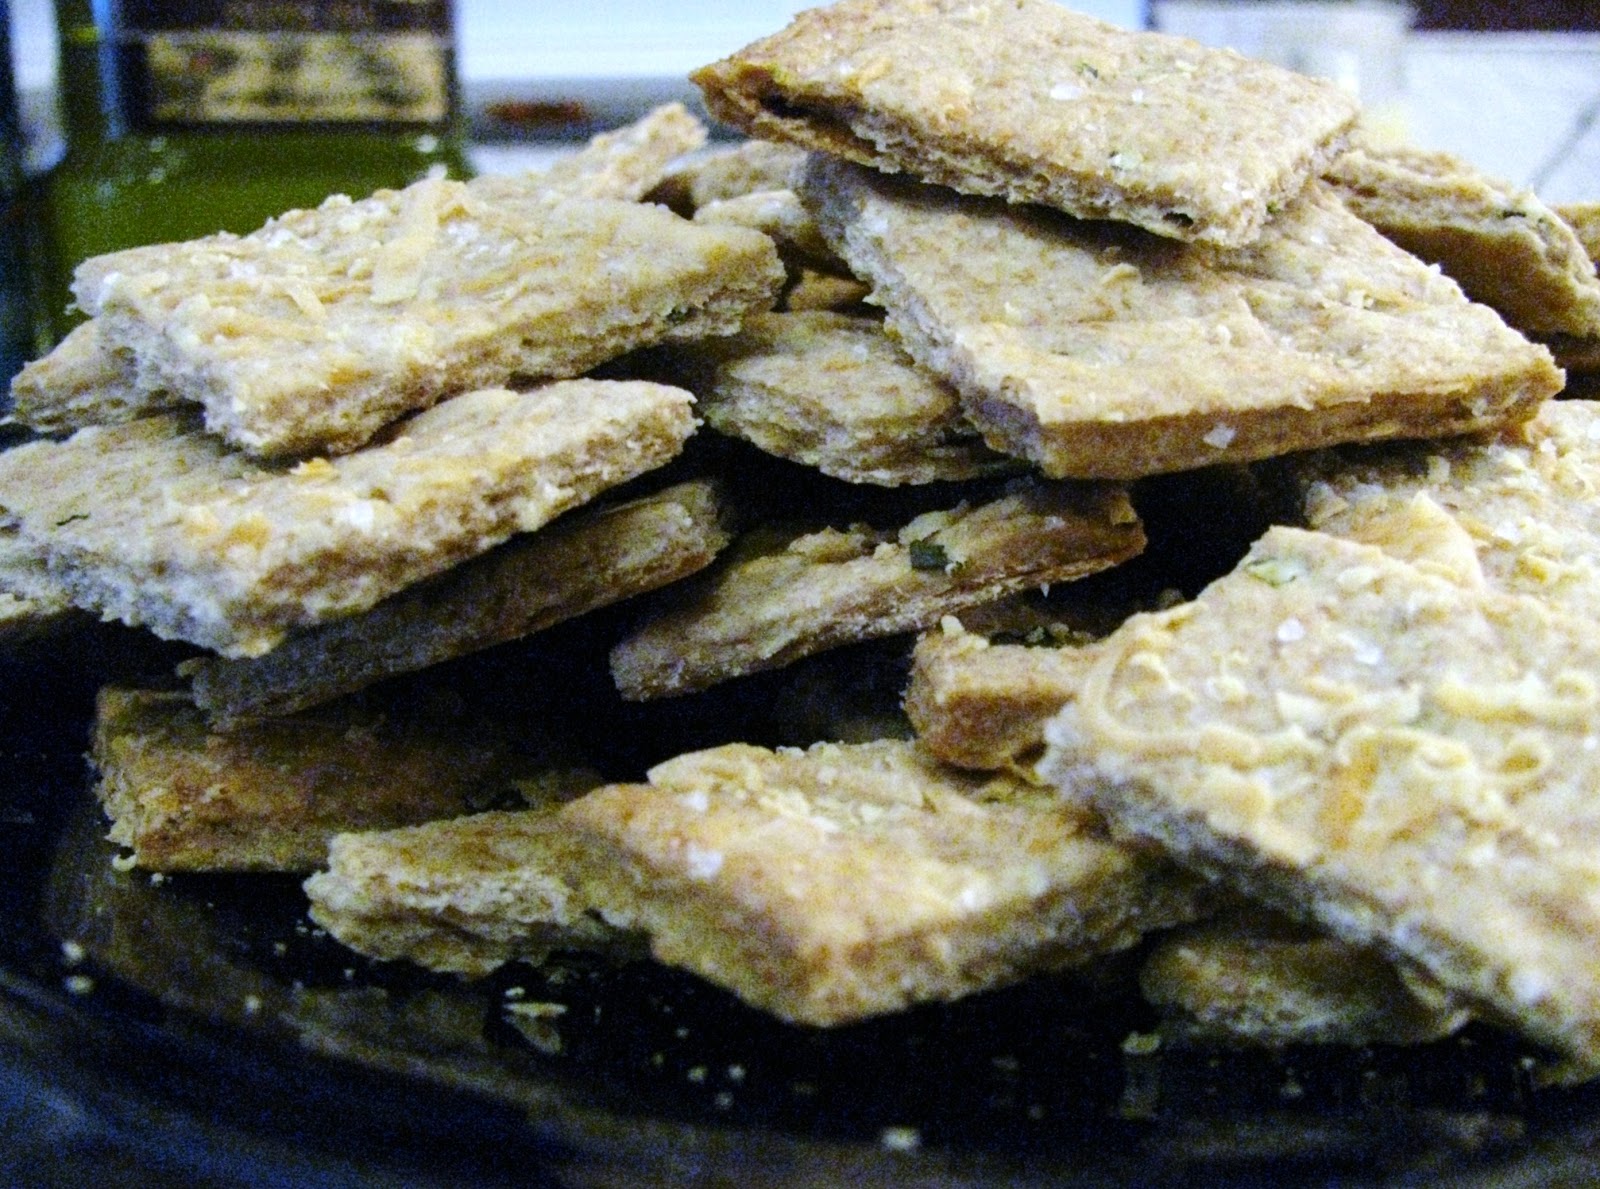
Wheat thins are pretty much a pantry staple. Those crispy little crackers in a yellow box are perfect for snacking but they also make a great appetizer. The only dilemma is that we always seem to be out...and they can be expensive.
I found this basic wheat cracker recipe a few weeks ago on allrecipes.com and since  have been experimenting with different flavor combinations. These crackers are addicting, especially when dipped in hummus or other spreads. I also like that they are natural, not laden with ingredients and preservatives that I can't pronounce. Try it out yourself, tweak the flavors, experiment with different ones, and see what you come up with.

Ingredients
  • 1 1/2 c. whole wheat flour
  • 1 3/4 c. all-purpose flour
  • 1 tsp. salt
  • 1/2 tsp. black pepper
  • 1 1/2 tsp. garlic
  • 1 tsp. onion powder
  • 3/4 c. Asiago cheese (you could also try Parmesan, sharp cheddar, or other cheeses)
  • 1/3 c. chives, chopped fine
  • 1/3 cup vegetable oil
  • 1 cup water
  • sea salt for sprinkling
  • olive oil
Preheat oven to 375 degrees Fahrenheit.
In a medium sized bowl whisk together wheat flour, all-purpose flour, 1 teaspoon of salt, black pepper, garlic powder and onion powder. Add in the chives, and 1/2 c. of the cheese, stirring to combine.
Add vegetable oil and water, mixing until combined. You will be left with a very firm ball of dough.
Remove the dough to a lightly floured flat surface. Grab your rolling pin and begin rolling out into a large rectangle. This is where you will begin working off all those calories that you will consume once these crackers are finished! Work, work, work that dough until it is thin sheet (1/8 of an inch or thinner), large enough to fit into a baking sheet.
Transfer your dough to an ungreased baking sheet. Use a pizza cutter to trim off excess overhang. (You can set this extra dough aside and bake it in a smaller second batch.)
Lightly brush with olive oil. Sprinkle with remaining cheese and sea salt.
Use your pizza cutter to trace out lines about 1 inch apart on the surface of the dough, taking care not to cut all the way through. Turn your cookie sheet and do this in the other direction, to form a grid of squares. Don't worry, they don't have to be perfect! Prick the entire surface of the dough lightly with a fork.
The original recipe says to bake these for 15-20 minutes, but I found it takes my oven between 20-25.That being said, check your crackers at 15 minutes and then at intervals of 5 minutes until you notice that they are starting to brown. When you first pull them out of the oven they may not seem crispy, but they will begin to crisp up as they cool.
When cool break crackers apart. Store in a Ziploc bag to maintain freshness. Enjoy!
*Note: I'm not quite sure how long these will stay fresh in the pantry...but we've enjoyed ours for up to 3 days and they still taste fresh. By that time, they are usually gobbled up. :)

Friday, April 1, 2011

Chicken Piccata


Chicken Piccata is an easy chicken dish everyone needs to know how to make! Maybe it's just a little bit bias, but Billy and I both agree that we've never had it prepared better anywhere, than in our own kitchen. This is our favorite chicken dish. It's good with garlic smashed potatoes, it's great over pasta, but tonight after a day of traveling I decided to make a lighter Caesar Salad with  Lemon Caesar Dressing from a recipe at Epicurious. Besides, when a friend gives you a bowl full of fresh lemons...you might as well utilize them for something delicious! Thanks Edie!

Chicken Piccata

4 chicken cutlets, or 2 boneless skinless chicken breasts, butterflied and cut in half
salt and pepper
1 1/2 c. all purpose flour
5 tablespoons butter
5 tablespoons extra-virgin olive oil
1/3 c. fresh lemon juice
1-2 tablespoons fresh lemon zest
1/3 c. good white wine
1/3 c. whole milk
3 T capers, rinsed
1/4 c. grated Parmesan

Directions:
Season chicken on both sides with salt and pepper. Place flour in a shallow dish and dredge. In a large skillet over medium high heat, melt 2 tablespoons of the butter with 3 tablespoons of olive oil. When sizzling add 2 pieces of chicken and cook for about 3 minutes or until brown. Flip and continue to cook for 3 more minutes. Once the other side is browned remove to a plate. Add 2 more tablespoons each of butter and olive oil and repeat steps with remaining pieces of chicken. Deglaze pan with lemon juice, wine, and capers, scraping up any brown bits. Bring mixture to a boil and then return chicken to pan and simmer for 5 minutes. Remove chicken to serving platter and set aside. Return pan to medium heat and whisk in the remaining tablespoon of butter. Add milk and cook until sauce begins to thicken. Pour sauce over chicken and garnish with zest and grated Parmesan.