Showing posts with label Holiday Ideas and Homemade Gifts. Show all posts

Monday, February 13, 2012

No Bake Nutella Cheesecake

They warned me about Pinterest and I should have stayed away...but it's so addicting! This recipe caught my eye, or rather a delicious looking picture of this recipe caught my eye on Pinterest and I had to try it. Warning: It's about addicting as Pinterest itself! My pictures don't do this recipe justice...go to the blog My Baking Addiction to see something a bit more beautified :).

I piped melted white chocolate into the shape of hearts onto a
chilled cookie sheet to make these little hearts.


No Bake Nutella Cheesecake
*adapted from My Baking Addiction

Ingredients
12 Oreo cookies
3 Tbsp. butter or margarine, melted
1 (8 oz.) package of cream cheese, softened
2/3 c. Nutella
1 tsp. vanilla extract
2 tablespoons of hazelnut liqueur (Armaretto is also good)
8 oz. of whipping cream, whipped and chilled
Optional garnish of: chocolate shavings, extra whipped cream, chopped hazelnuts, or in my case 1/2 of a chopped hazelnut milk chocolate bar and white chocolate hearts in honor of Valentine's Day.

Place Oreos in a Ziploc bag and crush. Add melted butter and shake to combine. Divide crumb mixture between serving dishes (I used wine glasses) and press to the bottom to make a crust.

In your mixer combine cream cheese, Nutella, & vanilla extract. Beat until smooth. Gently fold in whipped cream until it is fully incorporated.

Pipe or spoon into serving dishes. Cover and refrigerate for at least 2 hours. Garnish as desired.

It's so easy!


Thursday, December 8, 2011

Molasses Sugar Cookies

 It's just not Christmas until we've made a batch or two of these delicious spiced cookies. They have a crunchy outside, chewy center, and the aroma of these cookies will fill your house with yummy! They are amazingly simple, keep well, make a wonderful addition to your kid's teacher gifts. That is, if you can hide enough of them from your family to give away. They're also a great cookie for kids to help make as they can help roll the dough into balls and dip them in the colored sugar.

Molasses Sugar Cookies
yield: 6 dozen

Ingredients:

A great gift for friends, neighbors, and teachers in these
cute bags I got from Hobby Lobby.
1 1/2 c. shortening
2 c. white sugar
1/2 c. molasses
2 eggs
4 c. flour
4 tsp. baking soda
2 tsp. cinnamon
1 tsp. cloves
1 tsp. ginger
1 tsp. salt
1 pinch of cardamom (optional)
Christmas colored sugars

Directions:

  • Melt shortening in a saucepan and cool. 
  • Add to mixer bowl and cream with sugar, eggs, and molasses.
  • Mix dry ingredients in a separate bowl and slowly add to wet mixture. Mix well.
  • Cover and chill in the refrigerator for 3 hours or overnight.
  • Preheat oven to 350 degrees.
  • Roll dough into walnut size balls and roll in colored sugar. Place 2 inches apart on a cookie sheet and bake for 10-12 minutes or until tops appear to crackle (see picture).
  • Cool and store in an airtight container.


Thursday, December 1, 2011

Peppermint Brownies

Decorating for Christmas got me in the mood to bake something special for dessert tonight. I got this crazy idea to whip up some peppermint flavored buttercream icing and spread it over a batch of brownies. Then I remembered the Hershey's Candy Cane Kisses that I had hiding in my cupboard. Voila! So simple and so fancy I think I might make these for Christmas.

Candy Cane Brownies
for the brownies:
1 box of your favorite brownie mix

for the frosting:
1/4 c. butter
2-21/2 c. powdered sugar
1/2 tsp of vanilla extract
3/4 tsp of peppermint extract
2-3 tbsp. of milk
15 unwrapped Hershey's Candy Cane Kisses

Directions:
Prepare brownies according to package directions. Cool completely.

In the meantime prepare the frosting. Cream butter in mixer until fluffy. Gradually add in powdered sugar, extracts, and milk and whip on medium speed until combined.

Spread frosting onto cooled brownies. Lightly chop the kisses and sprinkle over the top.  Enjoy!

Tuesday, October 4, 2011

Pumpkin Spiced Cupcakes with Cream Cheese Frosting

You've got to try these! I decided I needed a "fall" themed cupcake and found this awesome Pumpkin Cupcake recipe from Martha Stewart. Because they were a "test batch" of sorts, I quartered the recipe and made these in my miniature cupcake pan, perfect for a bite size treat. I'm definitely going to whip these up again for Halloween. The remaining minis in my refrigerator are definitely going to work with the hubby tomorrow.The month of October is packed with enough sugar on it's own!


Pumpkin Spice Cupcakes with Cream Cheese Frosting
recipe Adapted from Martha Stewart
Makes about 18 regular cupcakes, and approximately 4 dozen minis

2 c. flour
1 tsp. baking soda
1 tsp. baking powder
1 tsp. salt
2 1/2 tsp. pumpkin pie spice
1 c. packed light brown sugar
1 c. granulated sugar
1 c. (2 sticks) unsalted butter, melted and cooled
4 large eggs, lightly beaten
1 15 oz can pumpkin puree

Preheat your oven to 350 degrees. Coat pan with non-stick spray or line with paper liners.
In a medium bowl combine flour, baking soda, baking powder, salt, and pumpkin pie spice. Set aside.

In a large bowl whisk together both sugars, butter, and eggs. Add dry ingredients and whisk until smooth. Whisk in pumpkin puree.

Fill cups about halfway with batter. Bake 20-25 minutes (about 12-15 for miniatures) until tops spring back when touched. Remove to a wire rack and cool completely.

Cream Cheese Frosting
1 8 oz. tub cream cheese      
1/2 c (or 1 stick) unsalted butter
2 tsp. vanilla
4 c. powdered sugar

Whip cream cheese and butter until combined and creamy. Add in vanilla and powdered sugar and whip on low speed for 1 minute and on medium-high speed for an addition 3-4 minutes until creamy.

To Decorate:

Tint frosting desired color, I used yellow and red drops to create and orange tint. Pipe onto cupcakes with a frosting bag or a sturdy Ziploc bag with the corner cut off and top each cupcake with a candy corn, or three...:) .

Saturday, September 17, 2011

Pumpkin Spiced Latte

Did you run to Starbucks as soon as the Pumpkin Spiced Latte became available a couple of weeks ago?  Are you remortgaging your house so that you can afford said "lattes." The hubby and I tested out this recipe tonight and I give it an A+ for being as close to Starbucks as possible. I was so glad to find canned pumpkin, albeit a small can, for less than $2.00 today at Walmart. I've had this recipe in my hands for over a week and I just couldn't find it in me to shell out 3 almost 4 dollars for a can of pumpkin at other stores. Before I share the recipe a few notes: Use 1% or 2% milk and real sugar. After you've tasted this the right way then you can try and lighten it up. Also, you may find the pumpkin puree to be a bit mealy. If it bothers you Torani does make a Pumpkin Spice Syrup. You can replace the puree with the syrup. Without further or do, here is a recipe for a copycat pumpkin spiced latte.

Pumpkin Spiced Latte
2 tablespoons canned pumpkin puree
1 teaspoon good quality vanilla extract
2 tablespoons white sugar
1 cup 1 % milk
1/4 teaspoon pumpkin pie spice
1 (1.5 fluid ounce) jigger brewed espresso or double strength coffee  (I had no idea what a jigger was...but apparently it's the equivalent of a shot glass.)
Whipped cream, whipped topping, or whatever floats your boat :).

Brew your espresso and set aside.
 In a small saucepan over medium heat whisk pumpkin, vanilla, sugar, spice, and milk. Whisk continuously until hot. Do not bring to a boil or your milk will burn.
Place milk in a blender and whir a few minutes or until frothy. Pour into a mug and top with your jigger of espresso. Stir to combine and top with whipped cream. Enjoy!

At this rate you may still have money left over for Christmas shopping by the time fall is over.

Thursday, June 23, 2011

Red White & Blue Berries

I found this idea in the July edition of Family Fun magazine and couldn't resist trying it for a picnic we went to last night. They were a cinch to make and very fun! Colton, who doesn't even like strawberries (crazy I know!) couldn't resist helping me make these.

You'll need:
2-3 pints of fresh strawberries
1 bag of white chocolate chips
blue decorator sugar

Rinse off strawberries and let dry thoroughly on a clean towel. Line a large cookie sheet with wax paper and set aside. Place blue sugar into a small bowl and set aside. Place chocolate chips in another bowl. Microwave for 20 seconds at a time on medium power stirring until smooth. Working with 1 at a time, hold the stem of each strawberry and dip about 1/2 way into the chocolate. Shake off excess and dip the end into the sugar mixture so that the white chocolate layer is still visible, forming a stripe. Place on cookies sheet and chill once all berries are finished until chocolate is firm. Enjoy!

Thursday, June 9, 2011

Some Sweet Appreciation

 
I absolutely love giving homemade gifts, especially when it comes to end of the year gifts for teachers! Yesterday I set out to make a cookie bouquet for Colton's 1st grade teacher.

 
For this project I used a flower pot I bought for $1.00 at Walmart. Shredded paper (for a filler), decorative ribbon, and floral foam (also all from Walmart.) I used Bamboo Skewers for my cookie sticks because my Walmart didn't have extra long sucker sticks. I also included a couple of packets of flower seeds.

I won't tell you that this was a cinch to throw together or that it was a quick project. That would be a lie! I will tell you that yesterday, I learned the hard way that when making a project such as this, peace and quiet is required. My prettiest cookies were decorated after the kids were in bed and I no longer had anyone running through my kitchen asking for juice or trying to taste the frosting. I will also admit that at some point yesterday afternoon while I was frantically trying to decorate these little buggers, the hubby rolled up his sleeves and gave me a hand. It was definitely a family affair! 


Colton included a homemade card. It said something like this..."thank you for teaching me how to write and draw. So now its time for you to rest. We made you some cookies. So Bye." All his idea! It was so adorable! Of course, I can't tell him that or he'd get mad at me.


I'll also give credit where credit is due and tell you that I found the instructions, tips, and the sugar cookie and frosting recipes on the blog Your Home Based Mom, which is my new favorite place. If you're going to try this out, make sure you go there first.  I also included in my bouquet some Chocolate Chip Cut Out Cookies because I wanted some variation, and because I think no treat is complete without a bit of chocolate. The recipe is below.

 
Here are a few of my own tips for putting together a cookie bouquet:

 
* Do not make big cookies, or cookies bigger than about 4 inches wide or tall. My biggest flowers fell off their sticks once they were upright because of their weight.
*Make more cookies than you need...better safe than sorry.
*Cut sticks to various sizes, within 1-3 inches. Try to keep your heaviest cookies on the shorter sticks to prevent then from falling off.
*If you don't plan on giving away your bouquet until the next day, hold off on putting your cookies in the arrangement...just in case. You don't want to wake up to a crumbled bouquet.
*Wrap your finished bouquet in a big piece of cellophane paper tied off with a decorative bow. It will look pretty, and keep your cookies fresh until they are delivered.


Chocolate Chip Cut Out Cookies
inspired by a recipe on cooks.com
 
1 c. softened butter or margarine
1/2 c. packed brown sugar
1/3 c. granulated sugar
2 tsp vanilla extract
1 large egg yolk
2 1/2 c. flour
1/2 tsp. salt
1/4 tsp. baking soda
1 1/2 c. miniature chocolate chip

Cream butter, sugars, and vanilla in a large mixing bowl. Beat in egg yolk.
 
 
In another bowl, mix flour, salt, and baking soda. Gradually add to butter mixture.
 
 
Stir in miniature chocolate chips. Cover dough with plastic wrap and chill for 1 hour.

 
Roll dough out onto a floured surface to about 1/4 inch thickness and cut into shapes with cookie cutters. Place 2 inches apart on ungreased baking sheets. (insert skewers or long sucker sticks if using for a cookie bouquet.)


Chill for 10 minutes and bake at 350 degrees for 9-11 minutes or until edges begin to brown.


Thursday, April 7, 2011

Egg-stra Special Easter Eggs


Oh Martha! She's got some of the most creative ideas! Last year I stumbled upon her instructions for Silk -Tie Easter Eggs and I decided to try it out on hollowed out eggs. This way they won't spoil, and they turned out so cool! With careful packing (thank you Hubby!) they survived our move to Southern California. Today I made several more to add to my display. I'm thinking that this will be an ongoing Easter Tradition.

*Tip: Silk items can be purchased at a second-hand store. I got mine for $2.00 a piece at Goodwill. Double check labels to make sure you're using 100% silk.

What you'll need:
small or medium eggs
A long thin nail
Something to tap in the nail (I used a mallet)
A Glass or Enamel Pot (I use a metal stockpot and they come out just fine.)
A ceramic plate or smaller pan lid, slightly smaller than the diameter of the pot you are using. (This will keep the hollowed eggs from bobbing above the water.)
Silk ties, blouses, or boxers, cut into pieces large enough to cover an egg
White sheets (or pillow cases, tablecloths, or in my case the hubby's old white T-Shirt) cut to cover silk wrapped eggs
Twist ties or string
3 tablespoons of white vinegar
Warm water
Vegetable oil
Paper towels
Tongs or spoon

How to hollow eggs
*Prepare for a few cracked eggs. I've never done a dozen without cracking a few. :)
  • Wash and dry raw eggs.
  • Keep the egg in the carton and place the tip of the nail onto the top of the egg. Tap (very lightly) with a hammer or mallet, piercing a small hole in the top of the egg.
  • Twist the nail into the egg and flip so that the egg is on top of the nail. Run the nail into the egg several times to help break up the yolk. Flip the egg and do this again on the other side.
  • Place your lips on one end of the egg and blow out the yolk (over the sink or into a bowl)
  • Rinse with warm water and set aside.
Dyeing the eggs
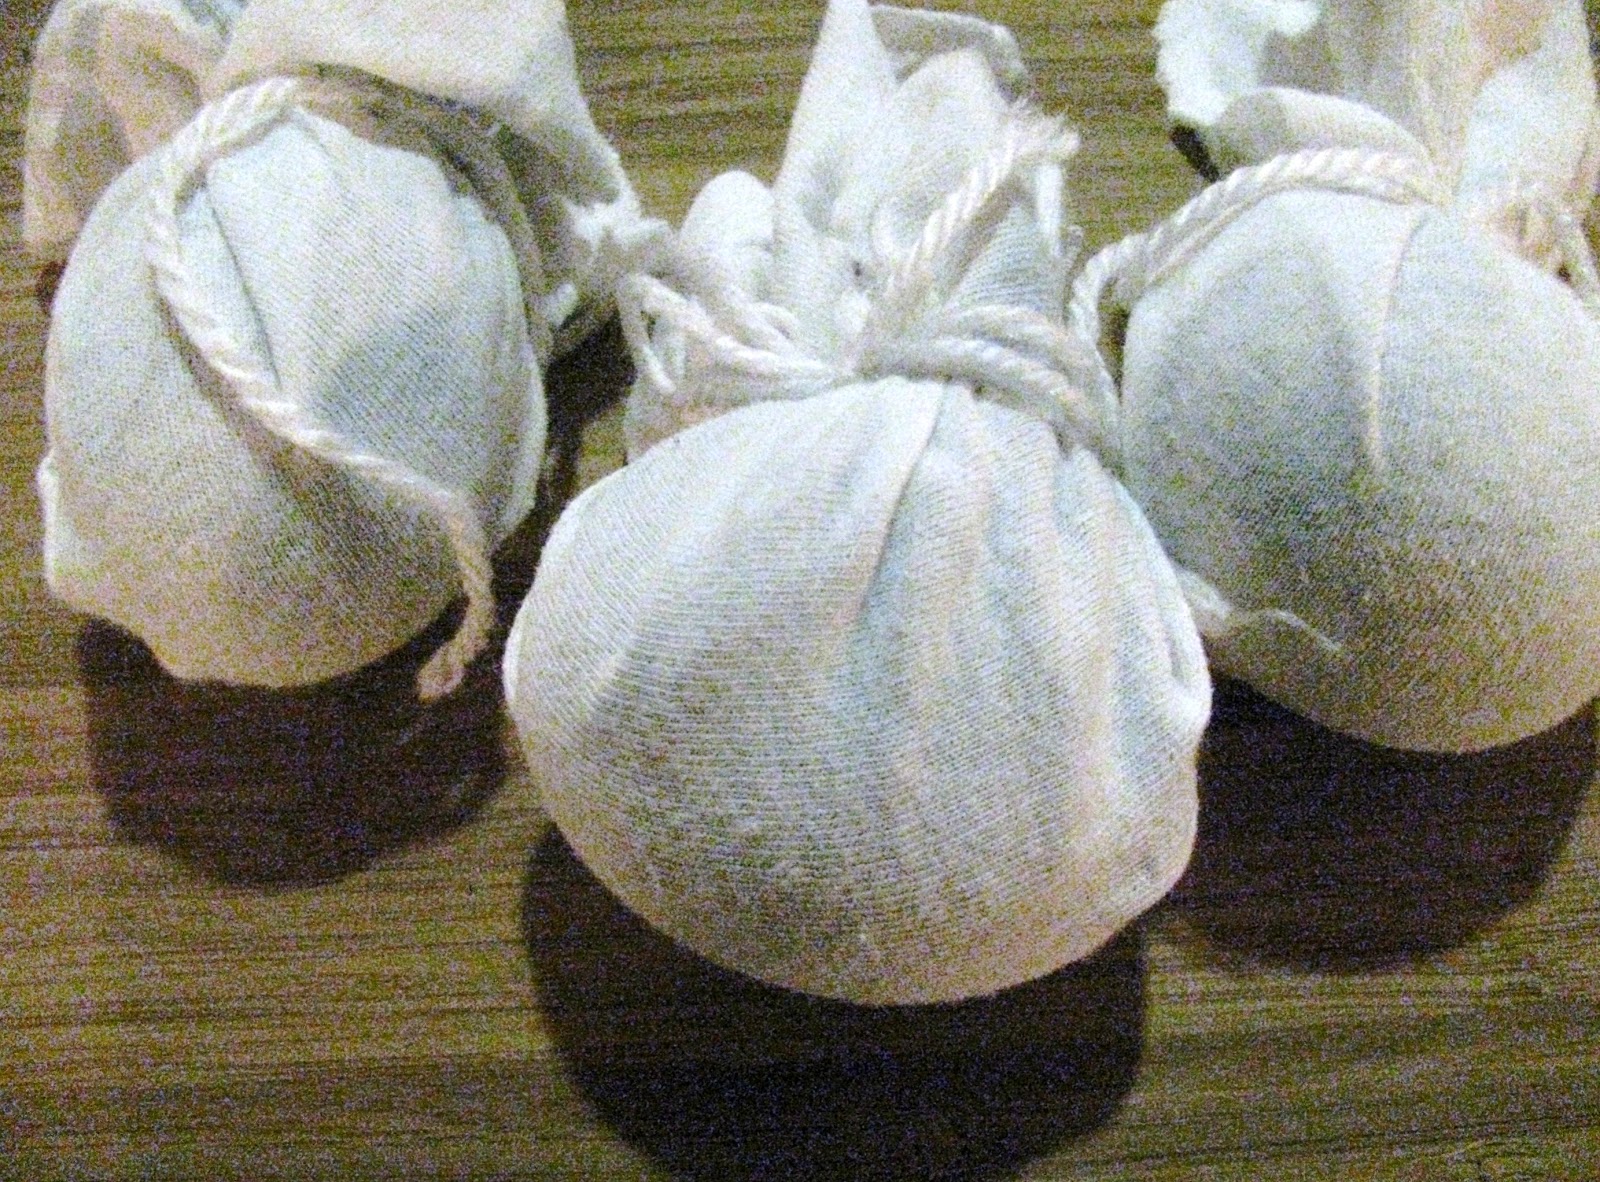
  • Wrap an egg with silk, print side facing in. If the piece is not large enough to cover the entire egg it will still work. Gather ends of the silk and tie off. It will kind of look like a little package.
  • Place wrapped egg into the center of a piece of white cloth. Gather the ends of the cloth and tie off.
  • Place a few eggs (enough that they aren't over crowded) into your pot. Fill pot with enough water to cover eggs completely. Add three tablespoons of white vinegar and place a ceramic plate or lid carefully over the eggs to hold them underwater.
  • Bring water to a low boil, turn heat down, and simmer for 20 minutes
  • Remove eggs from water with tongs or spoon and let cool.
  • Remove cloth from cooled eggs and blow out the water. You may have to re-pierce holes to do this. If you want your eggs to be shiny wipe with vegetable oil.